LiveCreative: Macrame’ Chair

Do you have an outdoor chair with a great frame, but the seating area is gone? I did and wanted to make it fabulous again. With some time and patience, I made the chair even better than it was new!

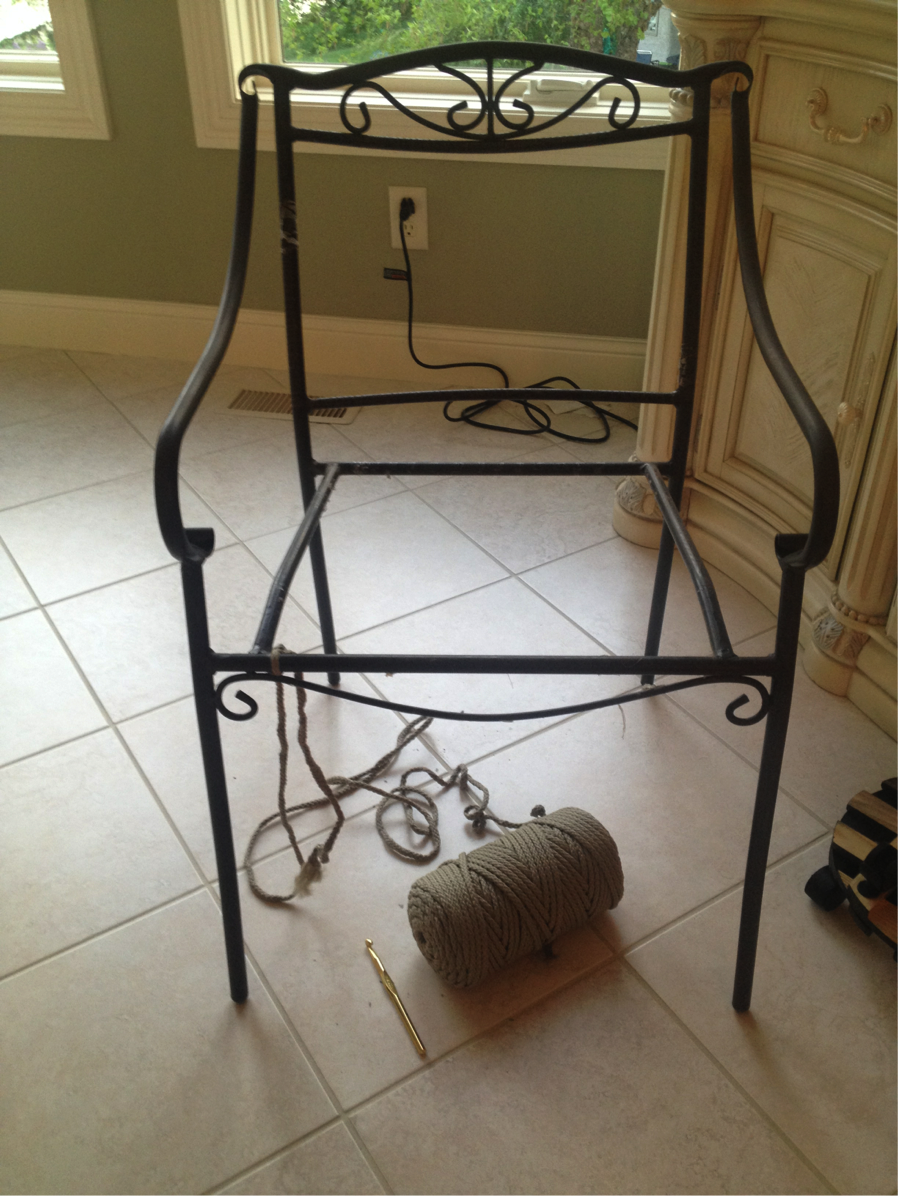
I removed the rattan from this frame and had a great shell. I did a search on Macramé chair and found some great directions, see link Macramé Chair

You will need:

2 big plastic 19mm crochet hooks, I got these at Michaels

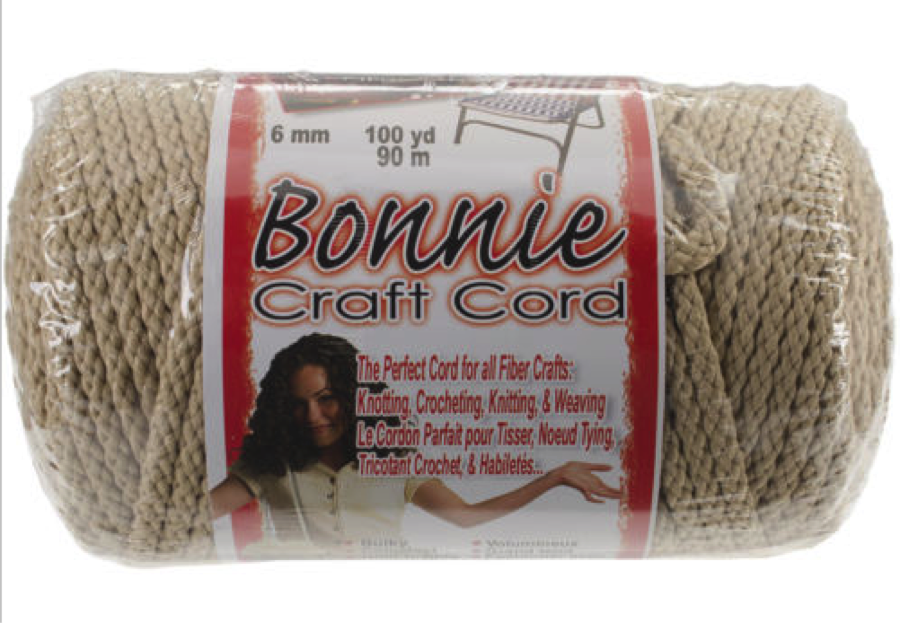
approximately 2 skeins of the 6mm craft cord, I used the Bonnie craft cord in the Jute color.

I had these really great chairs that had given up the rattan.  I removed it and had a great form for the Macrame’.

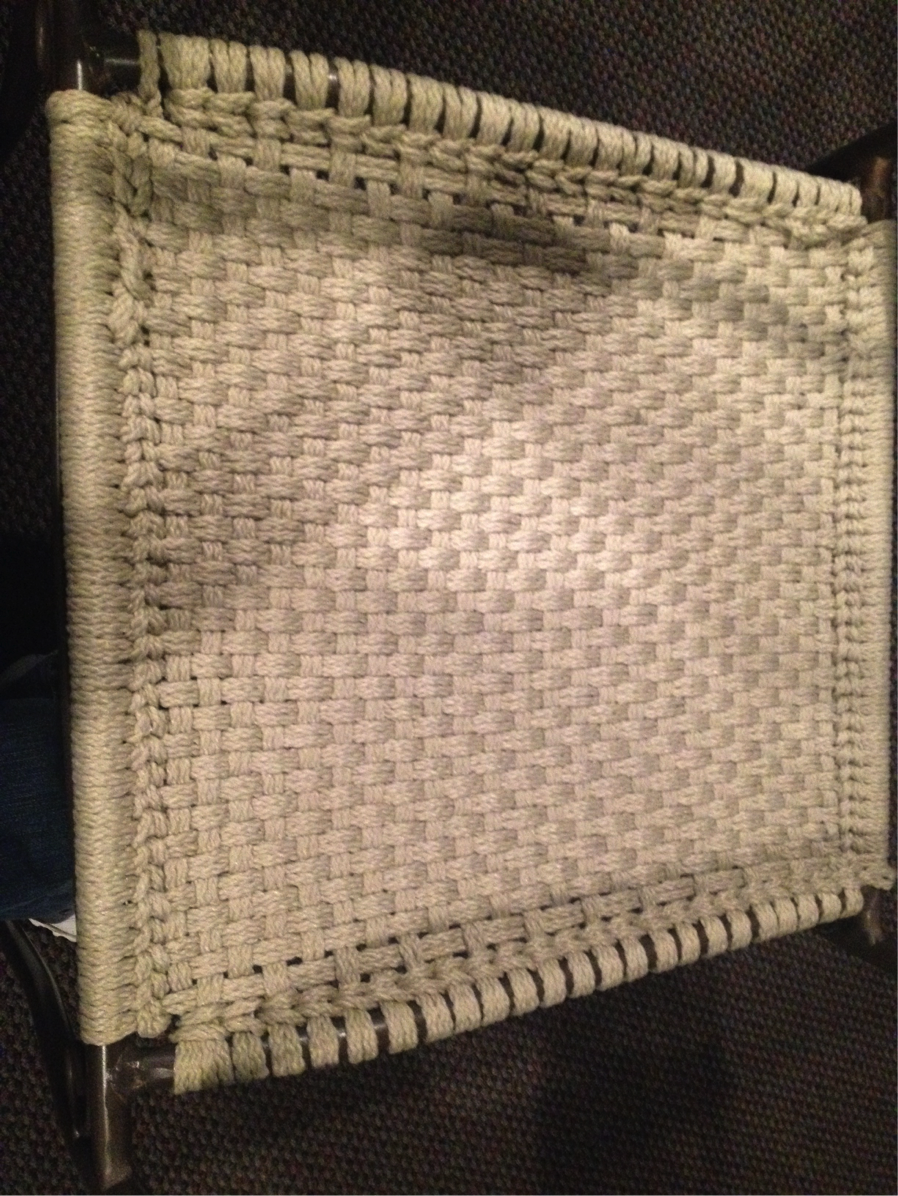
Tie a square knot in one corner, then start weaving.  The video does a great job of walking thru the weaving.

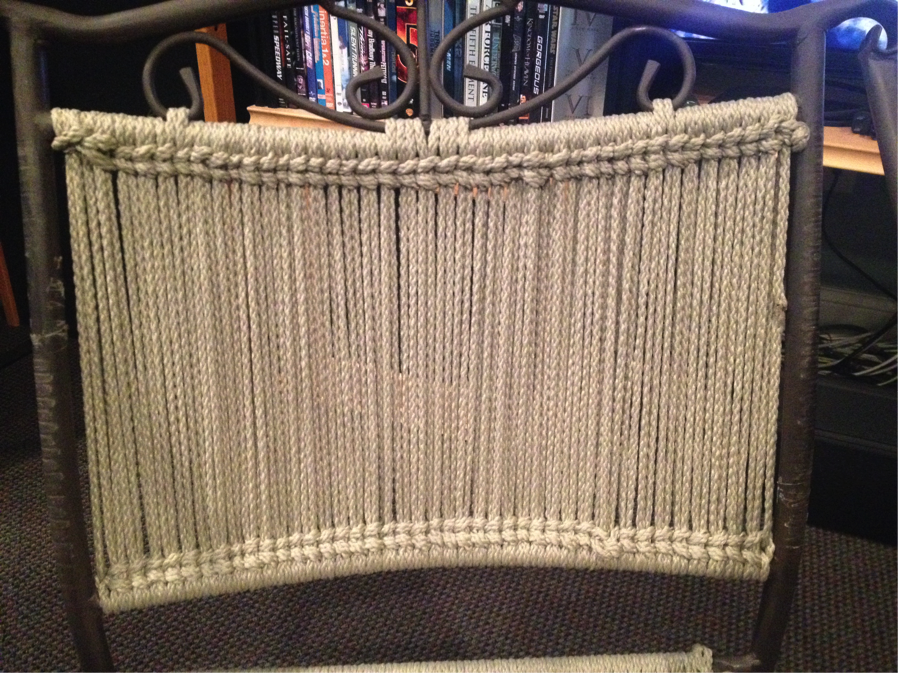
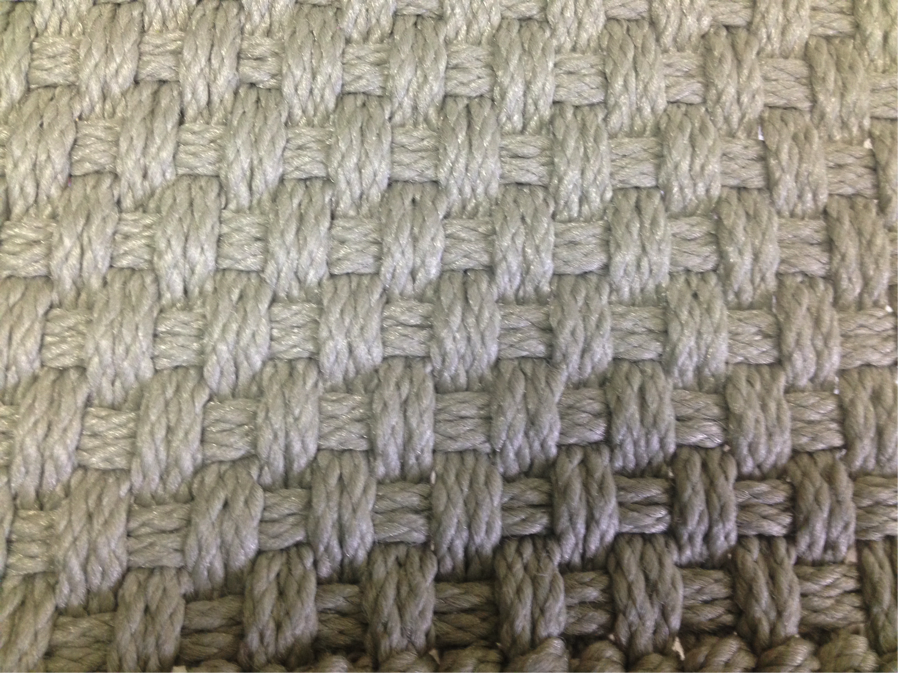
The first layer of weaving is one direction, then  once done you start weaving between the two strands of each first pass.  Use the crochet hooks to hold the loops of the strand you are working on.

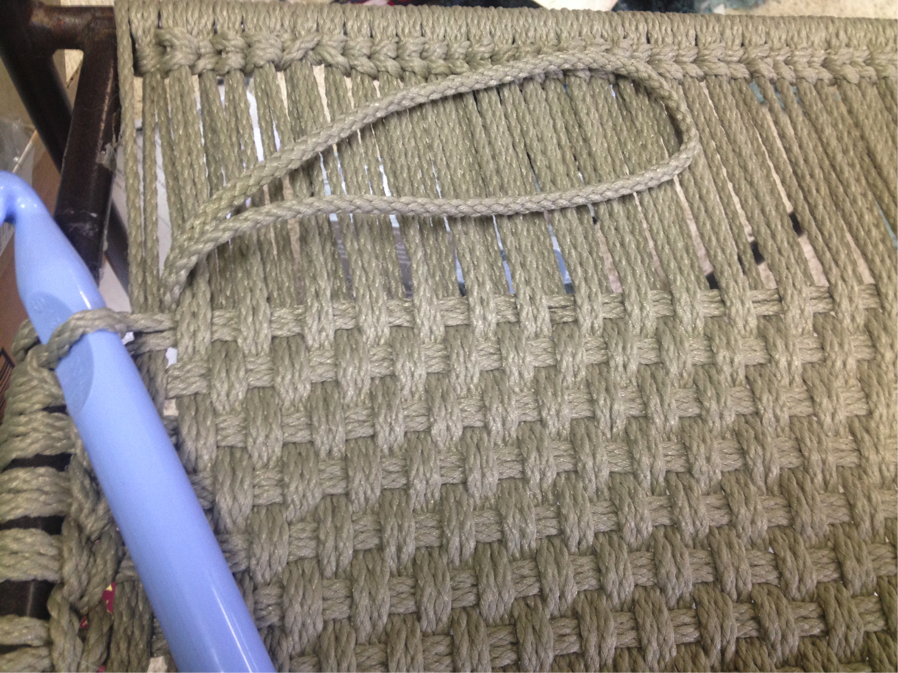
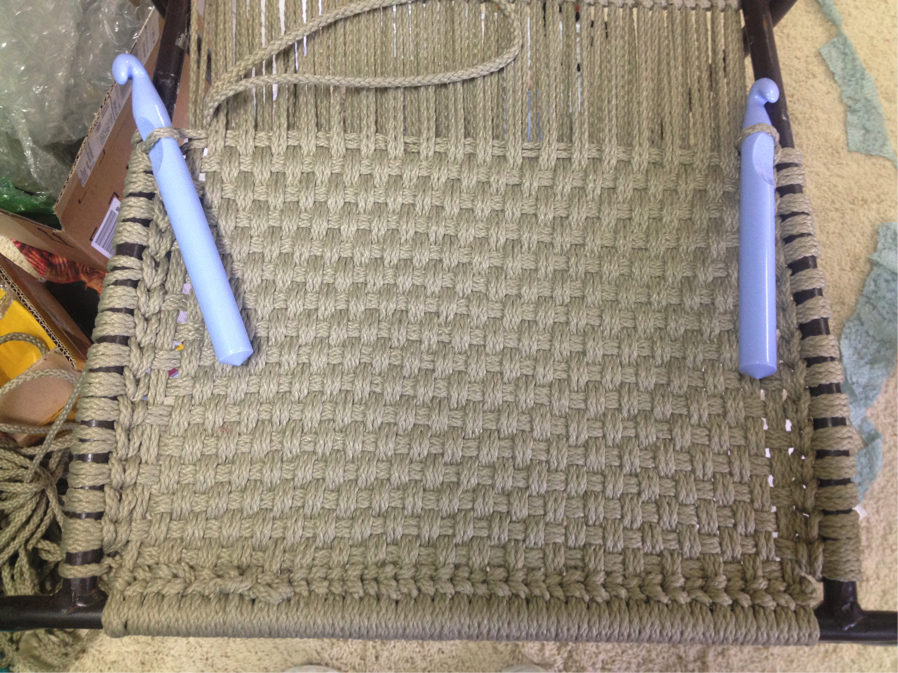
The hardest part is getting everything tight enough.  After a few rows use the hooks or something else to push all the rows tight.  Do this tightening throughout the weaving process.

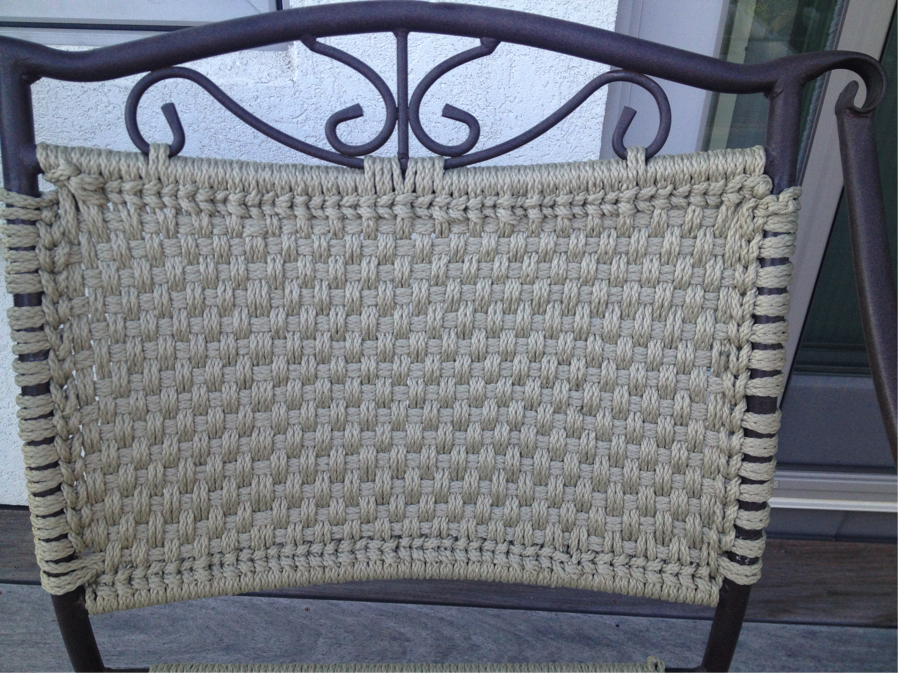
Once the seat is done, move to the back. The ends will be looped thru in a knot, and then burned with a flame to ensure the rope does not ravel.  Then the seared end can be tucked into the weaving.


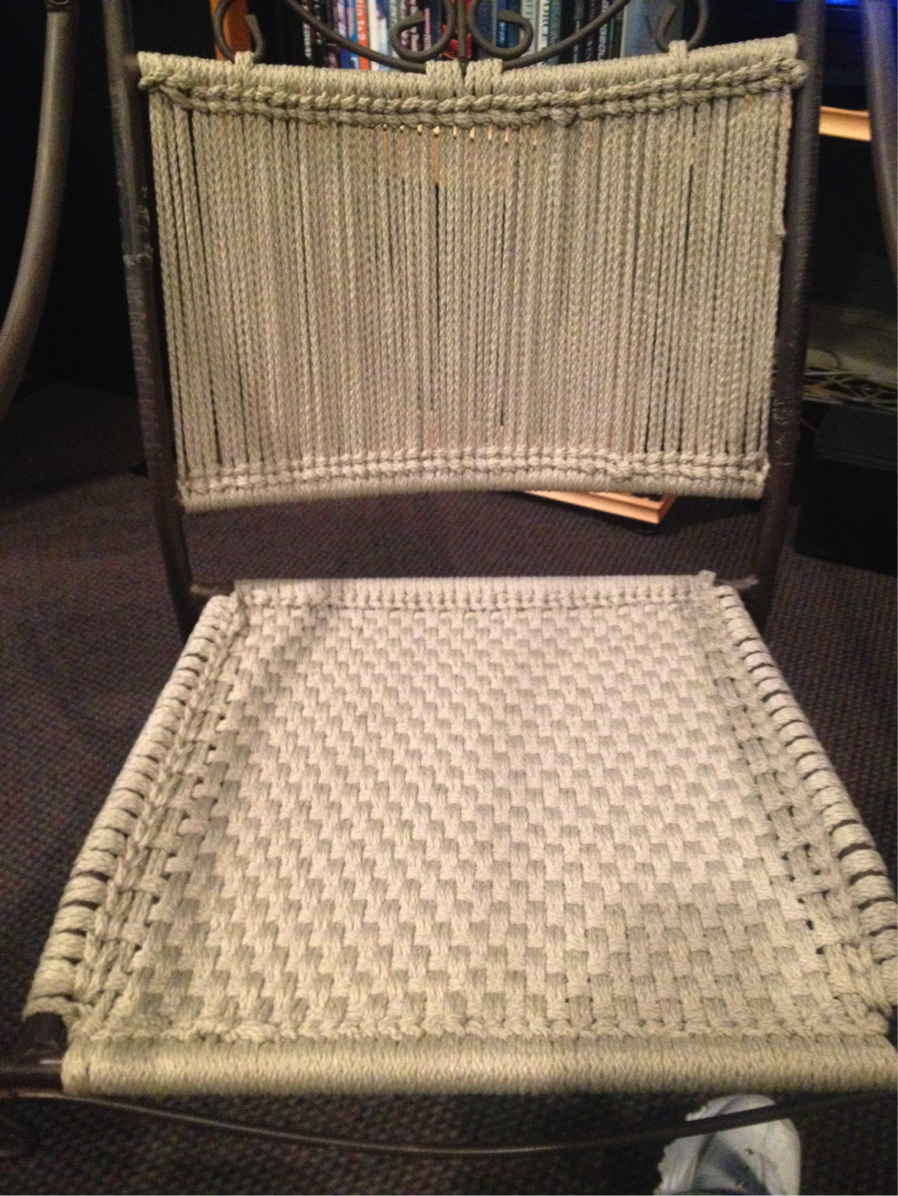
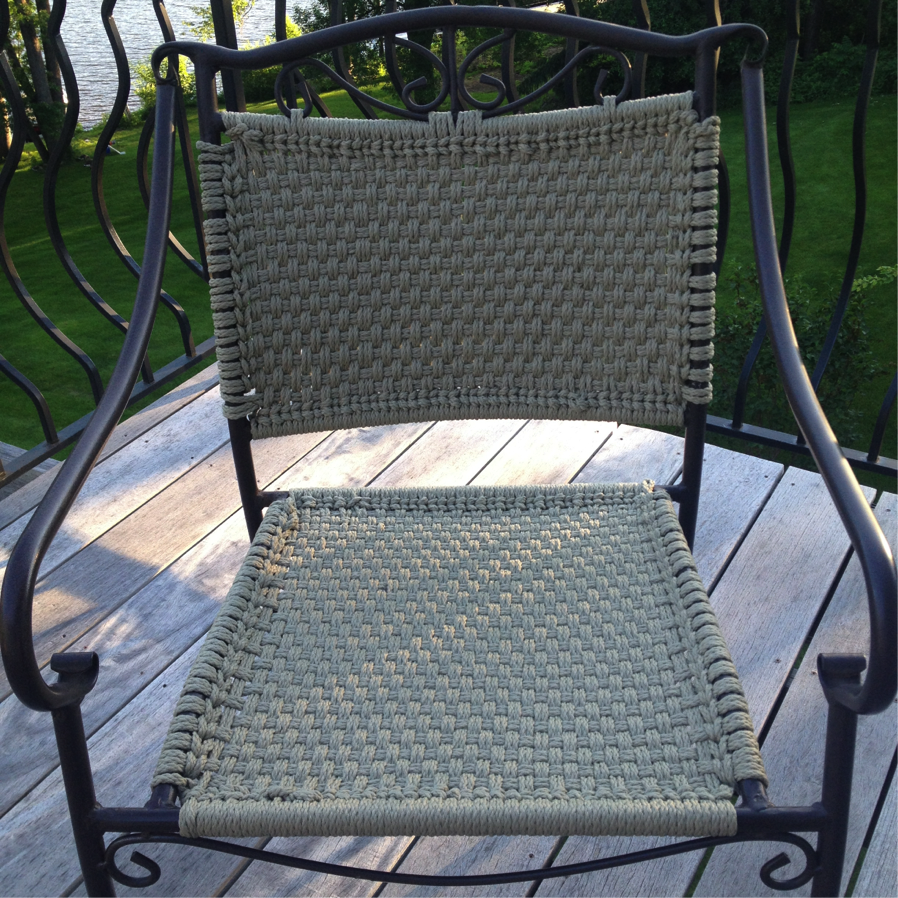
I wove two chairs and am thrilled with how they turned out!

LiveCreative: Silver Leather Jacket

I wanted a silver leather jacket, but did not want to spend much money. Sometimes Goodwill has nice stuff for reasonable prices. It took a bit of time shopping at a few different locations, before I found one I liked the style and fit, and got it for $5! If you are not in a hurry you can find really wonderful things!
The leather jacket I chose was black with a silver lining.

I cleaned the leather with alcohol one day and dyed it the next to ensure it was dry.

I used a pewter and silver dye mixed together to get the color I wanted.

It took a bit of trial and error and since I started with a black jacket, it took 2 coats, but I am super happy with how the jacket turned out. I wear it a lot and get many compliments.

Remember to take some extra time around the seams and stitching, to ensure the dye gets in all the crevices. The underside of the zipper leather will show when you are zipping and unzipping, so remember this detail. You can also dye the fabric of the zipper, if needed. Especially important if you are changing colors of a jacket. Underneath the collar is very important. The leather in the pockets can show, and the leather inside the sleeves and inside the jacket. Between the layers of leather on the edge of the collar will take some extra care but it will be worth the time.

I love my results.  I have worm the jacket several times and love it.  The leather is still soft and pliable.  It is a great jacket.

Recipe: Veggie Smoothie

Smoothies seem to be the rage right now. When I first heard about it, I was not interested in trying them.  I had no desire to drink my food. Then I was doing some research about tightening up my diet. I would love to have an amazing muscular stomach, which means I need to be leaner than I am currently. My neighbor then started telling me she was juicing her breakfast, feeling great and dropping weight, without changing anything else. I thought ok, if I need to add more veggies into my diet and I am not interested in eating cups of veggies for breakfast, maybe I need to think about the juicing or smoothie option.  I started looking for veggie smoothie recipes online. All the recipes I found online had lots of carbs- fruit and strong flavored veggies I do not want for breakfast.  

Necessity is the mother of invention!

I started with favorite mild veggies that pack a  good veggie punch, and I came up with my recipe. This has become my breakfast most mornings. I can put it together on the way out the door and drink it at my desk while I am working. I am aiming for about 300 calories, and relatively low carb. I do not want to take a ton of insulin for breakfast. Net carbs = 17 – I am having to take 2-3 units.

  • 1c unsweetened almond milk
  • 1/2 c fat free greek yogurt
  • 100g zucchini
  • handful of greens
  • 2 cups cauliflower
  • 1 scoop protein powder

1 cup or 240grams of unsweetened Almond milk

1/2 cup or 115 grams of plain greek yogurt

100grams of zucchini, about 1/2 a cup

1 handful of greens.  I like the Aldi mixed greens with baby kale and baby spinach.

I have used both vanilla and strawberry protein powder. I like them both.  I buy whatever is reasonably priced, with minimal carbs.  25 grams of protein,  and less than 150 calories per serving.  

1 scoop = 33 grams of protein powder

I add the protein powder on top of the greens so it does not get wet too soon and stick to the side of the blender cup.

I then cut up and fill the blender cup with cauliflower.  About two cups or so of chopped cauliflower

Once the blender cup is full, screw on the blender blade lid. Blend until super smooth.  

I then add the secret morning ingredient, coffee!

Since the smoothie is somewhat thick to start with, and I drink cold coffee anyway, I add black coffee to the veggie smoothie, which thins it out, ads a bit of flavor along with my morning caffeine. I love it.  I get 3 cups of vegetables, along with the kick from my coffee, and plenty of protein for my breakfast.  It takes me a couple of hours to drink while I am working, so it keeps me full all morning until time for lunch.

I have made this for my mother and my husband without the coffee and they both really like it, so it is kid and mother approved! Husband=kid!

Please let me know what you think of the Pamtastic smoothie…

Recipe: Zucchini Lasagna

I love lasagna but not all the carbs. I have taken the standby lasagna and  made a healthy low carb version, full of veggies. I use zucchini instead of pasta. I promise you will not miss the pasta!

I calculated the nutritional data with the ingredients and brands I used, please feel free to change anything, to make it your own.

I use about 1050 grams of zucchini, plus or minus and yes I do weigh it on my scale! I slice it long ways using a mandolin on 3/8 -1/2” thick setting. Zucchini that got lost in the garden, hidden behind leaves and ended up getting too big, are perfect for this recipe.

I use the Hunts Garlic & Herb pasta sauce, it is about $1 a can and low carb – two of my favorite things!  5 grams of net carbs per serving.

Brown the meat. I have made this with ground buffalo, or beef.  You can also use turkey.  Add onion and anything else you would like. I cook the meat, remove any water/fat, then add the pasta sauce and a package of fresh mushrooms when I have them.

Then I add just a bit of the sauce in a 9×13 glass baking dish. I am not sure this step is necessary, before layering the zucchini. The zucchini releases water as it cooks, so nothing ever sticks to the baking dish.

I then layer the zucchini in the baking dish, filling it pretty tight.

I did some intersting zucchini patch work here, but once it is put together you cannot tell.

The next layer is 2- 1/2 cups of cottage cheese, 1 egg, and a few spices.  I usually throw in basil and garlic, to taste.  If you prefer the ricotta cheese please use it. I love ricotta, but prefer a bit less calories and fat.

Mix this together and spread half of the mixture on top of the sliced zucchini.

Add half of the pasta sauce, meat mushroom goodness.

Then repeat the layers.  Start with the remaining sliced zucchini, then add the rest of the cottage cheese mixture.

Last half of the meat sauce.

Grate the mozzarella cheese, and add over the second layer of the meat sauce.

Bake at 350-375 degrees, my oven is a bit cranky, so I bake a bit hotter, for 45 minutes to 1 hour, depending on how golden you want it.

I slice this into 6 equal servings, which are quite large, but full of veggies. Let me know how you love it!

LiveCreative: Sandals New and Improved

I was shopping at my favorite store a few weeks ago, and found a pair of Style and Co sandals for $1! Yes a new pair of sandals for $1!

The gold color on the straps  was flaking and peeling in a few places, but for $1 I can get out some paint, and do a mix and match to achieve the right color to update the straps.

I found a few gold, taupe, cream paints in my stash.  I mixed them together to achieve the same gold as the sandal straps.

I was to lazy to get a brush, so I just applied with my fingers and I am happy with the result.  I did not touch up the gold paint on the tag in the sole of the sandal.

I am quite happy with how they turned out.  I have worn them several times since my refurbish.  Always look at a bargain to see if it is worth the time, and if so you have a  new item for a great price, a fun project and a story.  It is up to you if you tell the story, or just say thank you when you receive a compliement!

LiveCreative!